How to Do Walkway Construction Without Expert Help


Why Walkway Construction Matters for Your Long Island Property
Walkway construction transforms your property by creating durable, functional paths that connect your home to driveways, docks, or gardens while withstanding Long Island's coastal elements. Whether you're building a simple garden path or a formal entrance, understanding the construction process helps you make informed decisions about materials, techniques, and when to call a professional.
Essential Steps for Walkway Construction:
- Plan & Design - Measure space, mark utilities (call 811), choose materials
- Excavate - Dig 8-10 inches deep to accommodate base layers
- Build Base - Install 6 inches of compacted gravel plus 1 inch of sand
- Lay Materials - Place pavers or stones with proper ¼ inch per foot slope
- Finish Joints - Sweep polymeric sand between pavers and activate with water
The key to a lasting walkway isn't just the materials you choose—it's the quality of the foundation beneath them. A properly compacted base prevents settling, eliminates trip hazards, and ensures your walkway survives decades of freeze-thaw cycles common to Nassau and Suffolk Counties.
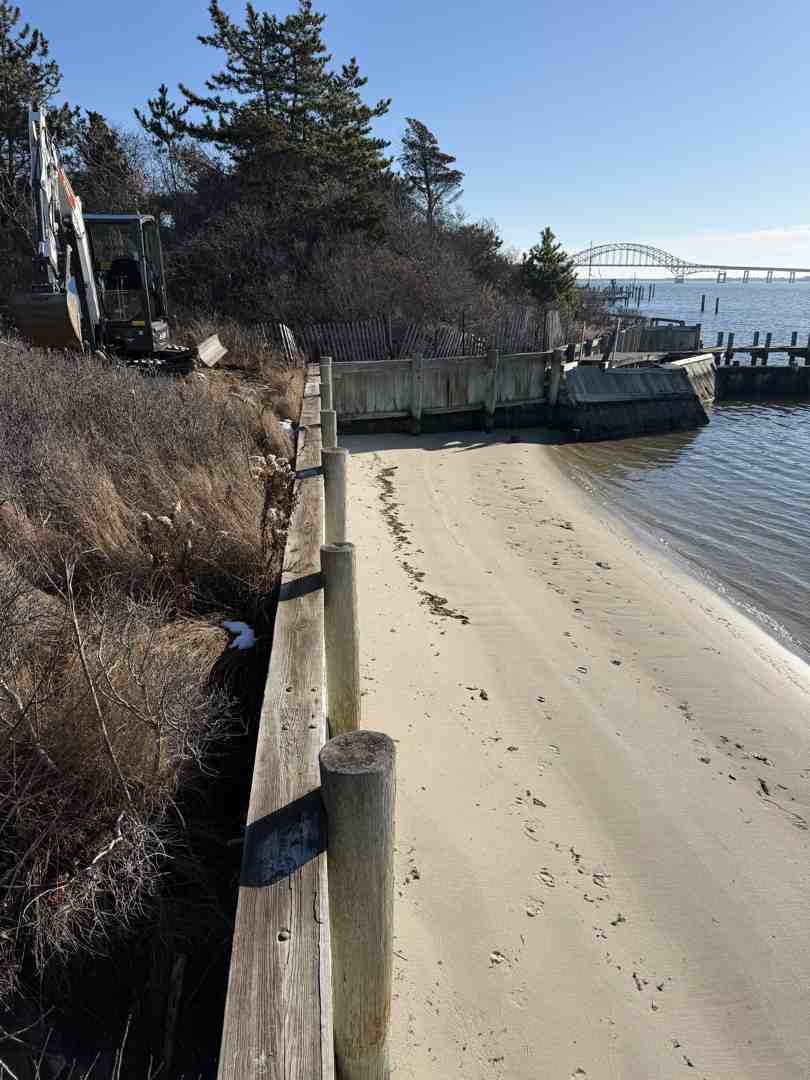
Many homeowners in Southampton, West Islip, and West Hampton successfully tackle basic walkway projects. While the work is physically demanding, it's manageable with proper planning. However, projects involving steep slopes, retaining walls, or integration with marine structures like docks often require professional expertise.
This guide walks you through each construction phase, from ground preparation to final finishing. You'll learn which materials work best in coastal environments, how to avoid common mistakes, and when to hire a professional contractor with local expertise.

The Complete Guide to DIY Walkway Construction
Starting a DIY walkway construction project can be incredibly rewarding, changing your outdoor space into a functional, beautiful area that adds value to your home. This guide covers the essential steps, from preparing the ground to laying the final paver, ensuring your project is built on a solid foundation that stands up to Long Island's unique climate.
Planning and Ground Preparation
Meticulous planning and ground preparation are critical for a successful walkway. Skipping this phase can lead to settling, weeds, and safety issues.
First, measure your space. A walkway should be at least 3 feet wide, but 4 feet is more comfortable. For accessibility, 60 inches is recommended. To visualize a curved path, lay out a garden hose on the ground and adjust as needed. For straight lines, use the 3-4-5 triangle method to ensure square corners.
Next, you must call 811 at least 48 hours before digging to have underground utilities marked. This is a non-negotiable safety step.
Once your layout is set, excavate to a depth of 8-10 inches below your desired finished surface. This allows for a robust base that can handle the freeze-thaw cycles in Nassau and Suffolk Counties. To ensure proper drainage, create a slight slope of ¼ inch per foot away from your house. This prevents water from pooling near your foundation. Crowning the walkway—making the center 1/4" higher than the edges—also helps with water runoff.
After excavating, build a stable base by laying a 6-inch layer of compactible gravel in two 3-inch lifts. Compact each lift thoroughly with a plate compactor, which you can rent for about $40-60 per day. A plate compactor is essential for proper compaction and a long-lasting result; a hand tamper is not sufficient for most projects. On top of the compacted gravel, add a 1-inch layer of bedding sand to create a level surface for the pavers.

For more insights into creating the perfect layout for your property, check out our article on Walkway Design Ideas. You can also find information on plate compactor rentals at Plate compactor rental.
Choosing Materials and Tools
Selecting the right materials and tools is key to a successful walkway construction project, especially in Long Island's coastal environment.
Here are some common walkway materials and their suitability for our region:
| Material | Pros - | Cons - || Concrete Pavers | Widely available, affordable, and durable. Resistant to freeze-thaw cycles. - | Cost: $2.50-$18/sq ft for materials. || Natural Flagstone | Unique, organic aesthetic, highly durable, and excellent for a natural look. - | Cost: $18-$50+/sq ft for materials. - || Brick | Classic, traditional look, exceptionally durable, and stands up well to heavy foot traffic. - | Cost: $10-$30/sq ft for materials. || Permeable Pavers | Eco-friendly, manage stormwater runoff, and can reduce municipal fees. - | Cost: 20-30% more than standard pavers initially. |
For tools, ensure you have:
- A sturdy shovel and rake for excavation and leveling.
- A long level (4ft or more) or a transit level for checking slopes.
- A rubber mallet for gently seating pavers.
- A masonry saw (wet saw recommended for clean cuts) or a chisel and hammer for cutting pavers.
- Essential safety gear: eye protection, hearing protection, and knee pads.
When calculating material quantities, always add 10% extra for cuts, breakage, and future repairs. It's better to have a few extra pavers than to run short mid-project.
For more insights into creating the perfect layout for your property, check out our article on Walkway Design Ideas. You can also find information on plate compactor rentals at Plate compactor rental.
Laying Pavers and Finishing Your Walkway Construction Project
Now it's time to lay your chosen materials and bring your walkway construction vision to life. We recommend starting from a corner or border and working your way out. Use taut string lines to ensure your pavers are straight and maintain the proper slope. Gently set each paver onto the bedding sand, tapping it firmly with a rubber mallet to seat it. Avoid dragging pavers across the sand, as this can disrupt the level surface. Aim for consistent 1/8-inch gaps between pavers.
Once your pavers are laid, install edge restraints around the perimeter. These are crucial for preventing pavers from spreading apart over time. Install them every 2 feet, just below the paver surface, for stability. For curves or intricate edges, you’ll likely need to cut pavers. A wet masonry saw provides the cleanest cuts, but a chisel and hammer can work for small adjustments. Always wear safety glasses when cutting.
The final step is filling the joints with polymeric sand. Unlike regular sand, it contains additives that create a strong bond when activated with water, locking pavers in place and preventing weeds. Sweep the polymeric sand diagonally across the surface, ensuring all gaps are filled. Use a broom to remove any excess sand from the paver surfaces. Finally, lightly mist the area with water to activate the binding agents. The sand will cure in 24-48 hours, creating a durable, weed-resistant joint.
While this section focuses on pavers, many of these principles apply to other walkway types, including concrete. For those considering concrete, the Best Practices for Concrete Sidewalk Construction (PDF) offers valuable insights. If you’re also thinking about integrating your walkway with other outdoor living spaces, our guide on Building Decks and Patios provides additional tips.
When to Call a Professional for Your Walkway Project
While many DIY projects are rewarding, some require professional expertise to ensure safety and longevity, especially in Long Island's coastal areas like Southampton or West Islip. Knowing when to call an expert can save you from costly mistakes.
Common DIY Walkway Construction Mistakes
Many DIY walkway projects fail due to common, avoidable errors. Understanding these pitfalls can help you decide if the job is right for you.

- Insufficient Base Compaction: An improperly compacted base is the number one cause of failure. It leads to uneven settling, creating trip hazards and a weak structure. A plate compactor is essential for a solid foundation.
- Incorrect Slope and Drainage: Forgetting the ¼-inch-per-foot slope can cause water to pool against your home's foundation, leading to expensive damage and icy winter hazards.
- Skipping Edge Restraints: These borders are crucial for preventing pavers from shifting and creating gaps over time. Without them, your walkway will lose its structural integrity.
- Uneven Paver Surfaces: An unlevel sand bed or improperly set pavers result in a bumpy, unsafe surface.
- Using Regular Sand: Regular sand in joints washes away, allowing weeds and insects to move in. Polymeric sand is necessary to lock pavers in place and prevent these issues.
These mistakes often lead to costly repairs, turning a budget-friendly DIY into a larger expense.
The Benefits of Hiring a Walkway Construction Expert
For homeowners in Wantagh, Brightwaters, or Babylon, hiring a professional for walkway construction is a smart investment, especially for complex projects. Pearce Marine Construction brings generational expertise and meticulous craftsmanship to every job.
Consider a professional for:
- Large or Complex Designs: Projects over 500 sq. ft., with intricate patterns, or requiring complex grading benefit from specialized equipment and experience.
- Steep Slopes and Retaining Walls: These require specific engineering knowledge to ensure safety and structural soundness. Walls over 3 feet high often need permits, which a professional can handle.
- Code Compliance: Experts ensure your walkway meets local building codes for width, slope, and accessibility, which is critical in areas like West Hampton and South Hampton.
Our longevity and craftsmanship mean your walkway is built to last. We understand the unique challenges of coastal construction in Nassau and Suffolk Counties, from sandy soils to freeze-thaw cycles. We select materials and use techniques that ensure durability against saltwater and extreme weather, which is vital for walkways near docks or bulkheads. For a reliable, long-lasting walkway, choosing a professional is a wise investment. Learn more about our services at Walkway Installation Near Me.
Maintaining Your Walkway for Lasting Durability
Proper maintenance will preserve your walkway's beauty and function for years, especially in Long Island's coastal environment.
- Re-sand Joints: Polymeric sand can erode over time. Re-sanding the joints every 3-5 years prevents weed growth and keeps pavers stable.
- Seal for Protection: Applying a quality paver sealer every 3-4 years improves color, protects against stains, and adds a layer of defense against the elements.
- Seasonal Cleaning: Regularly sweep away leaves and debris to prevent organic buildup in the joints. For winter care, use a paver-safe de-icer like magnesium chloride to avoid damage from harsh salts.
At Pearce Marine Construction, we build structures with generational expertise, designed to withstand the coastal elements in West Hampton, South Hampton, and beyond. For a walkway built with meticulous craftsmanship and durability, trust a professional. To explore how our expertise can benefit your property, please visit Learn more about our Decks and Walkways, Railings, and Stairs services.


Bring Your Vision to Life
Whether you're planning a custom dock, seawall, or boat lift, our experienced team is ready to deliver high-quality marine construction tailored to your needs. Pearce Marine Construction brings craftsmanship, precision, and a deep understanding of Florida’s waterways to every project. Let us help you create a durable, beautiful solution that stands the test of time. Get in touch now for a personalized estimate!